
반응형
심장 박동 센서(EKG Sensor : Electrocardiography Sensor)는 심장이 박동할 때 생기는 혈류의 변화를 이용해 심박수를 체크하여 동물의 심장 박동을 측정하는 센서입니다. 주로 모세혈관이 많이 분포 되어 있는 손끝이나 귀 주변 피부에 센서를 접촉하여 심박수를 측정합니다.
동작원리는 심장 박동 시 혈류가 증가하면 반사되어 돌아오는 빛의 양이 줄어들며, 혈류의 양이 적어지면 반사되어 돌아오는 빛의 양이 늘어나게 되어 Detector로 들어온 빛의 양으로 심장 박동수를 측정하게 되는 것입니다.
참고사이트
Heartbeats in Your Project, Lickety-Split ♥ – World Famous Electronics llc. (pulsesensor.com)
Heartbeats in Your Project, Lickety-Split ♥
Pulse Sensor, Heartbeat, Arduino, Raspberry Pi, littleBits, micro:bit, and more.
pulsesensor.com

회로도
소스코드
(1) 라이브러리 추가하기
- 툴-> 라이브러리 관리-> ' PulseSensor'검색
(2) 예제->PulseSensor Playground->Pulse_Sensor_BPM 선택
/*
   Code to detect heartbeat pulses from the PulseSensor

   Check out the PulseSensor Playground Tools for explaination
   of all user functions and directives.
   https://github.com/WorldFamousElectronics/PulseSensorPlayground/blob/master/resources/PulseSensor%20Playground%20Tools.md

   Copyright World Famous Electronics LLC - see LICENSE
   Contributors:
     Joel Murphy, https://pulsesensor.com
     Yury Gitman, https://pulsesensor.com
     Bradford Needham, @bneedhamia, https://bluepapertech.com

   Licensed under the MIT License, a copy of which
   should have been included with this software.

   This software is not intended for medical use.
*/

/*
   Include the PulseSensor Playground library to get all the good stuff!
   The PulseSensor Playground library will decide whether to use
   a hardware timer to get accurate sample readings by checking
   what target hardware is being used and adjust accordingly.
   You may see a "warning" come up in red during compilation
   if a hardware timer is not being used.
*/

#include <PulseSensorPlayground.h>

/*
   The format of our output.

   Set this to PROCESSING_VISUALIZER if you're going to run
    the Processing Visualizer Sketch.
    See https://github.com/WorldFamousElectronics/PulseSensor_Amped_Processing_Visualizer

   Set this to SERIAL_PLOTTER if you're going to run
    the Arduino IDE's Serial Plotter.
*/
const int OUTPUT_TYPE = SERIAL_PLOTTER;

/*
   Pinout:
     PULSE_INPUT = Analog Input. Connected to the pulse sensor
      purple (signal) wire.
     PULSE_BLINK = digital Output. Connected to an LED (and 1K series resistor)
      that will flash on each detected pulse.
     PULSE_FADE = digital Output. PWM pin onnected to an LED (and 1K series resistor)
      that will smoothly fade with each pulse.
      NOTE: PULSE_FADE must be a pin that supports PWM. Do not use
      pin 9 or 10, because those pins' PWM interferes with the sample timer.
     THRESHOLD should be set higher than the PulseSensor signal idles
      at when there is nothing touching it. The expected idle value
      should be 512, which is 1/2 of the ADC range. To check the idle value
      open a serial monitor and make note of the PulseSensor signal values
      with nothing touching the sensor. THRESHOLD should be a value higher
      than the range of idle noise by 25 to 50 or so. When the library
      is finding heartbeats, the value is adjusted based on the pulse signal
      waveform. THRESHOLD sets the default when there is no pulse present.
      Adjust as neccesary.
*/
const int PULSE_INPUT = A0;
const int PULSE_BLINK = LED_BUILTIN;
const int PULSE_FADE = 5;
const int THRESHOLD = 550;   // Adjust this number to avoid noise when idle

/*
   All the PulseSensor Playground functions.
*/
PulseSensorPlayground pulseSensor;

void setup() {
  /*
     Use 115200 baud because that's what the Processing Sketch expects to read,
     and because that speed provides about 11 bytes per millisecond.

     If we used a slower baud rate, we'd likely write bytes faster than
     they can be transmitted, which would mess up the timing
     of readSensor() calls, which would make the pulse measurement
     not work properly.
  */
  Serial.begin(115200);

  // Configure the PulseSensor manager.

  pulseSensor.analogInput(PULSE_INPUT);
  pulseSensor.blinkOnPulse(PULSE_BLINK);
  pulseSensor.fadeOnPulse(PULSE_FADE);

  pulseSensor.setSerial(Serial);
  pulseSensor.setOutputType(OUTPUT_TYPE);
  pulseSensor.setThreshold(THRESHOLD);

  // Now that everything is ready, start reading the PulseSensor signal.
  if (!pulseSensor.begin()) {
    /*
       PulseSensor initialization failed,
       likely because our particular Arduino platform interrupts
       aren't supported yet.

       If your Sketch hangs here, try PulseSensor_BPM_Alternative.ino,
       which doesn't use interrupts.
    */
    for(;;) {
      // Flash the led to show things didn't work.
      digitalWrite(PULSE_BLINK, LOW);
      delay(50); Serial.println('!');
      digitalWrite(PULSE_BLINK, HIGH);
      delay(50);
    }
  }
}

void loop() {
   /*
     See if a sample is ready from the PulseSensor.

     If USE_HARDWARE_TIMER is true, the PulseSensor Playground
     will automatically read and process samples from
     the PulseSensor.

     If USE_HARDWARE_TIMER is false, the call to sawNewSample()
     will check to see how much time has passed, then read
     and process a sample (analog voltage) from the PulseSensor.
     Call this function often to maintain 500Hz sample rate,
     that is every 2 milliseconds. Best not to have any delay()
     functions in the loop when using a software timer.

     Check the compatibility of your hardware at this link
     <url>
     and delete the unused code portions in your saved copy, if you like.
  */
if(pulseSensor.UsingHardwareTimer){
  /*
     Wait a bit.
     We don't output every sample, because our baud rate
     won't support that much I/O.
  */
  delay(20);
  // write the latest sample to Serial.
  pulseSensor.outputSample();
} else {
/*
    When using a software timer, we have to check to see if it is time
    to acquire another sample. A call to sawNewSample will do that.
*/
  if (pulseSensor.sawNewSample()) {
    /*
        Every so often, send the latest Sample.
        We don't print every sample, because our baud rate
        won't support that much I/O.
    */
    if (--pulseSensor.samplesUntilReport == (byte) 0) {
      pulseSensor.samplesUntilReport = SAMPLES_PER_SERIAL_SAMPLE;
      pulseSensor.outputSample();
    }
  }
}
  /*
     If a beat has happened since we last checked,
     write the per-beat information to Serial.
   */
    if (pulseSensor.sawStartOfBeat()) {
      pulseSensor.outputBeat();
    }
}
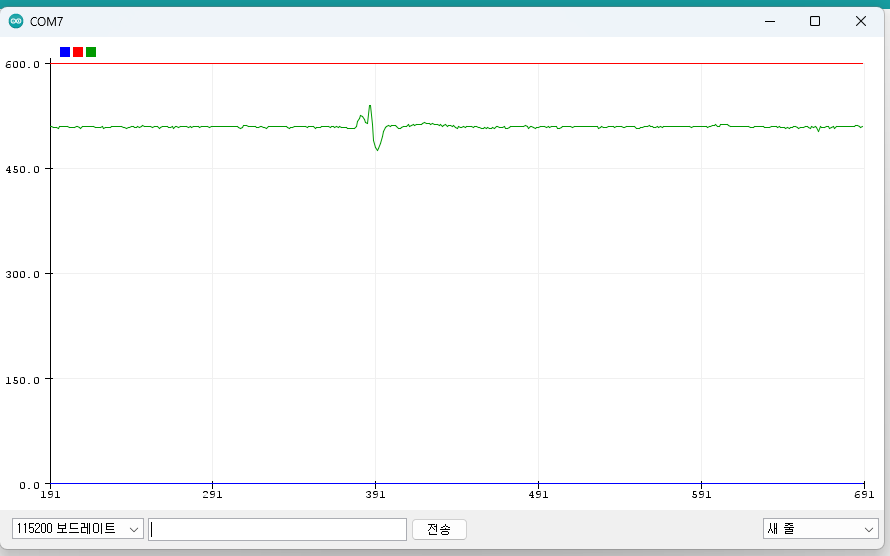
- 결과 확인
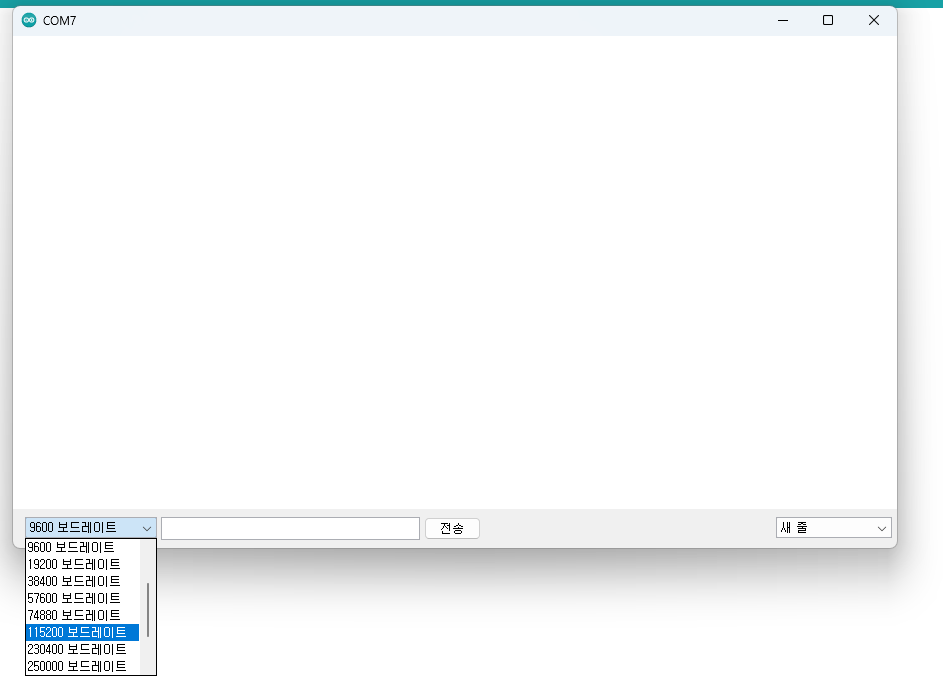
-시리얼 플로터로 확인하기

-보드레이트 115200으로 설정하
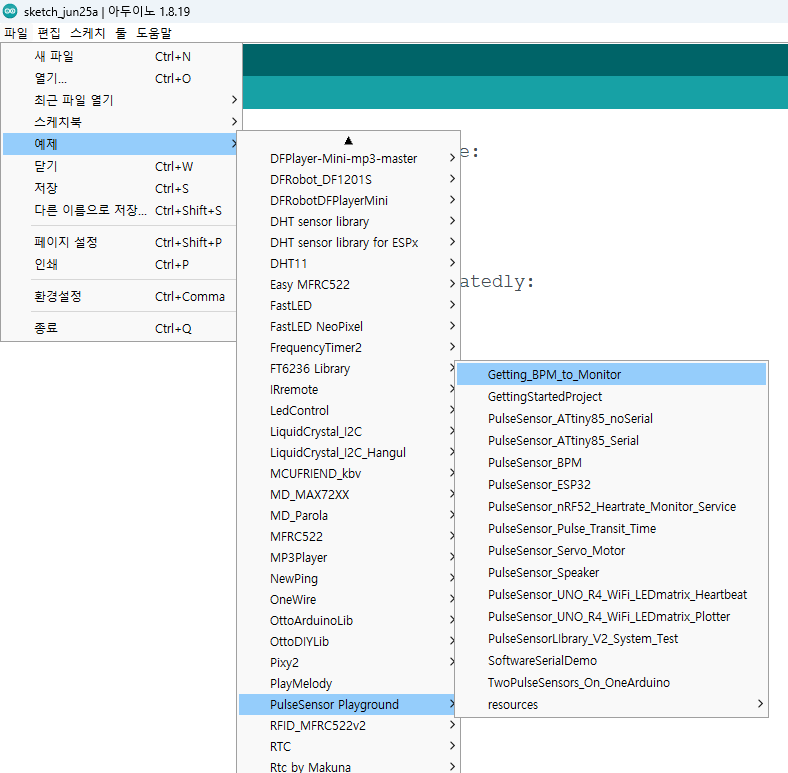
(3) 예제->PulseSensor Playground->Getting_BPM_to_Monitor 선택
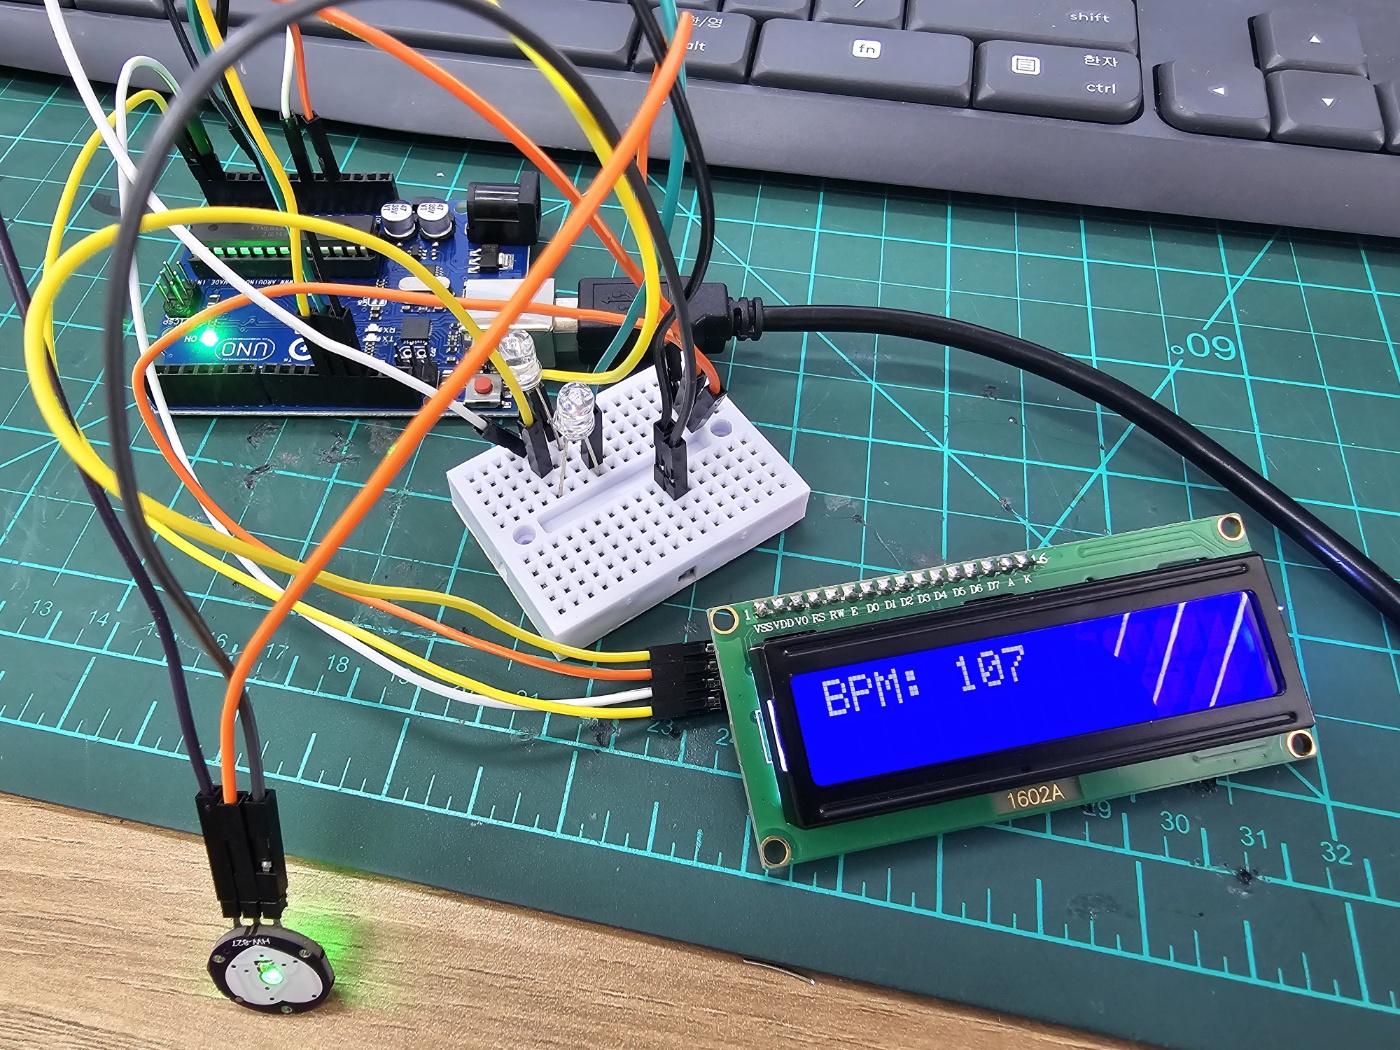
예제 소스코드에 LCD와 관련된 코드를 삽입(LCD활용 편 참고)하면 됩니다.
#include <PulseSensorPlayground.h>     // Includes the PulseSensorPlayground Library.
#include <LiquidCrystal_I2C.h>  //LCD
#include <Wire.h>
//  Variables
const int PulseWire = 0;       // PulseSensor PURPLE WIRE connected to ANALOG PIN 0
const int LED = LED_BUILTIN;          // The on-board Arduino LED, close to PIN 13.
int Threshold = 550;           // Determine which Signal to "count as a beat" and which to ignore.
                               // Use the "Gettting Started Project" to fine-tune Threshold Value beyond default setting.
                               // Otherwise leave the default "550" value.

PulseSensorPlayground pulseSensor;  // Creates an instance of the PulseSensorPlayground object called "pulseSensor"
LiquidCrystal_I2C lcd(0x27, 16, 2);

void setup() {
  Serial.begin(115200);          // For Serial Monitor
  lcd.init();  //LCD 초기화
  lcd.backlight();  //LCD 백라이트 활성화
  // Configure the PulseSensor object, by assigning our variables to it.
  pulseSensor.analogInput(PulseWire);
  pulseSensor.blinkOnPulse(LED);       //auto-magically blink Arduino's LED with heartbeat.
  pulseSensor.setThreshold(Threshold);

  // Double-check the "pulseSensor" object was created and "began" seeing a signal.
   if (pulseSensor.begin()) {
    Serial.println("We created a pulseSensor Object !");  //This prints one time at Arduino power-up,  or on Arduino reset.
  }
}


void loop() {
if (pulseSensor.sawStartOfBeat()) {            // Constantly test to see if "a beat happened".
  int myBPM = pulseSensor.getBeatsPerMinute();  // Calls function on our pulseSensor object that returns BPM as an "int".
                                                 // "myBPM" hold this BPM value now.
   Serial.println("♥  A HeartBeat Happened ! "); // If test is "true", print a message "a heartbeat happened".
   Serial.print("BPM: ");                        // Print phrase "BPM: "
   Serial.println(myBPM);                        // Print the value inside of myBPM.
   lcd.init();

   lcd.setCursor(0,0);   //첫째줄
   lcd.print("BPM: ");   //LCD 출력
   lcd.print(myBPM);
  }

  delay(20);                    // considered best practice in a simple sketch.

}
- 결과 확인
반응형
'피지컬컴퓨팅 > 아두이노' 카테고리의 다른 글
| #1편-ESP32 활용 온도-습도 알림기 만들기(ILI9341, DHT11활용) (0) | 2024.08.13 |
|---|---|
| #인공지능 AI 활용 - Mediapipe를 이용한 로봇 손 제어하기 (0) | 2024.07.17 |
| ESP32 와 ESP8266 차이점 비교 (0) | 2024.05.23 |
| #인공지능 AI 활용 - Hand Gesture로 아두이노 제어하기(LED 밝기 제어) (0) | 2024.04.18 |
| #인공지능 AI 활용 - Mediapipe로 HandTracking 하여 LED 제어하기 (0) | 2024.04.17 |


