
아두이노를 이용해 의수를 만드는 과정을 알아보겠습니다. 카메라에 인식된 손 모양을 opencv와 mediapipe로 인식하여 손가락 번호에 해당하는 숫자를 아두이노로 전송하여 움직이게 만드는 원리입니다.
먼저, 필요한 재료는 아두이노 우노보드, 서보 모터, 모터쉴드, 배터리, 전선 등이 필요합니다. 의수 부분은 3D 프린터로 출력한 부품을 조립하여 만들고 아두이노 보드와 서보 모터의 선을 연결하고 손가락을 움직일 수 있도록 서보 모터와 연결합니다. 다음으로는 아두이노 코드를 작성하고 업로드한 후, 배터리를 연결하여 의수가 움직이는지 확인합니다. 인공지능 의수이기 때문에 파이썬의 opencv를 이용하여 카메라에서 사람의 손가락 움직임을 따라 의수가 움직이도록 제작하였습니다. 위와 같은 과정으로 아두이노와 카메라를 이용한 의료용 의수를 만들 수도 있습니다. 아래의 상세한 설명과 함께 사진과 동영상도 함께 제공되어 있으니 관심있으신 분들은 도전해보시기 바랍니다.
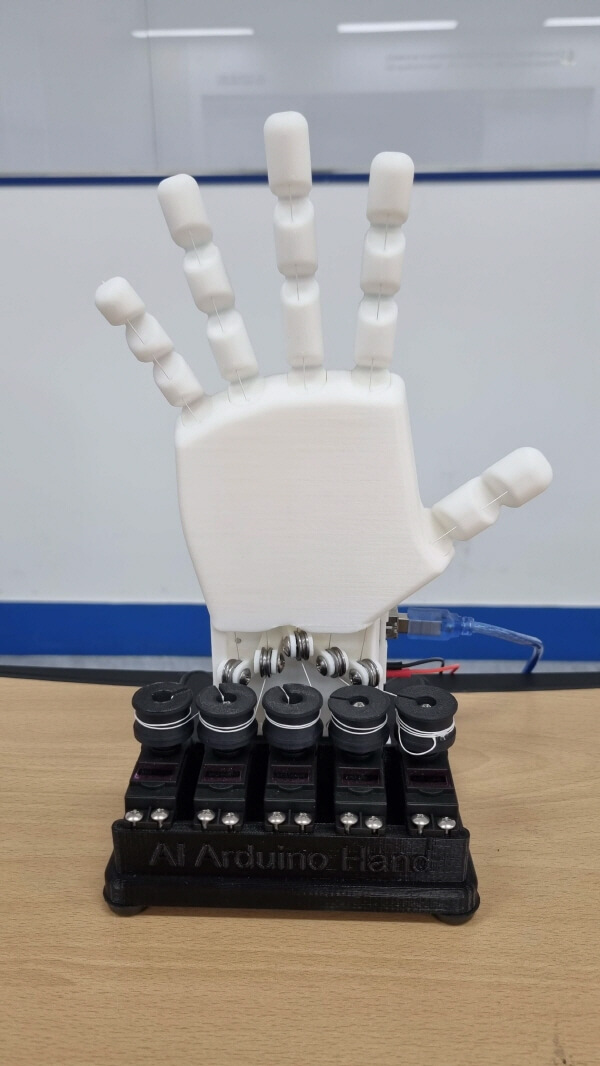
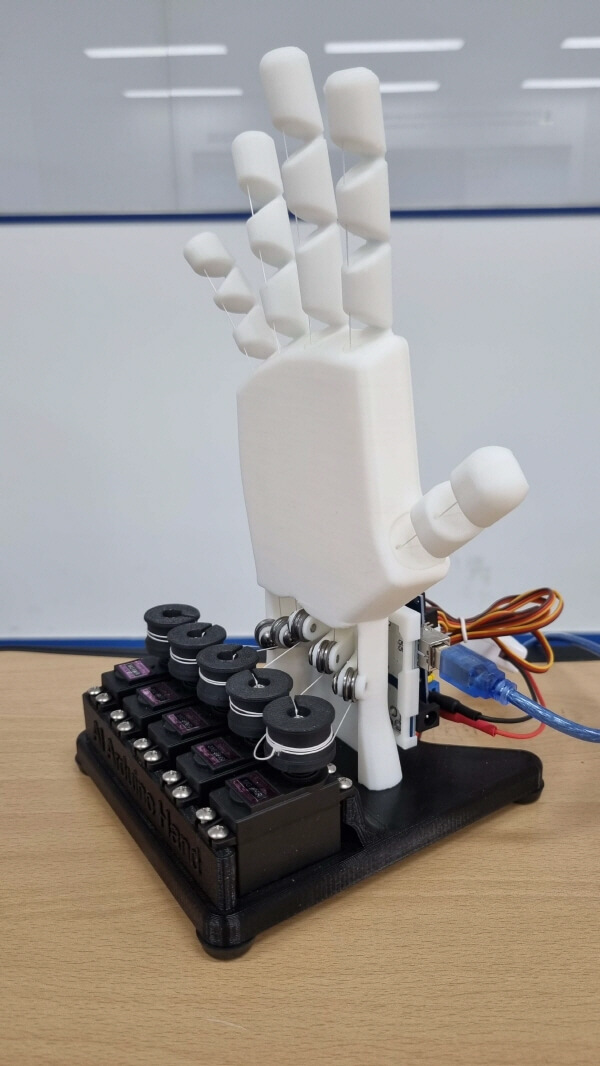
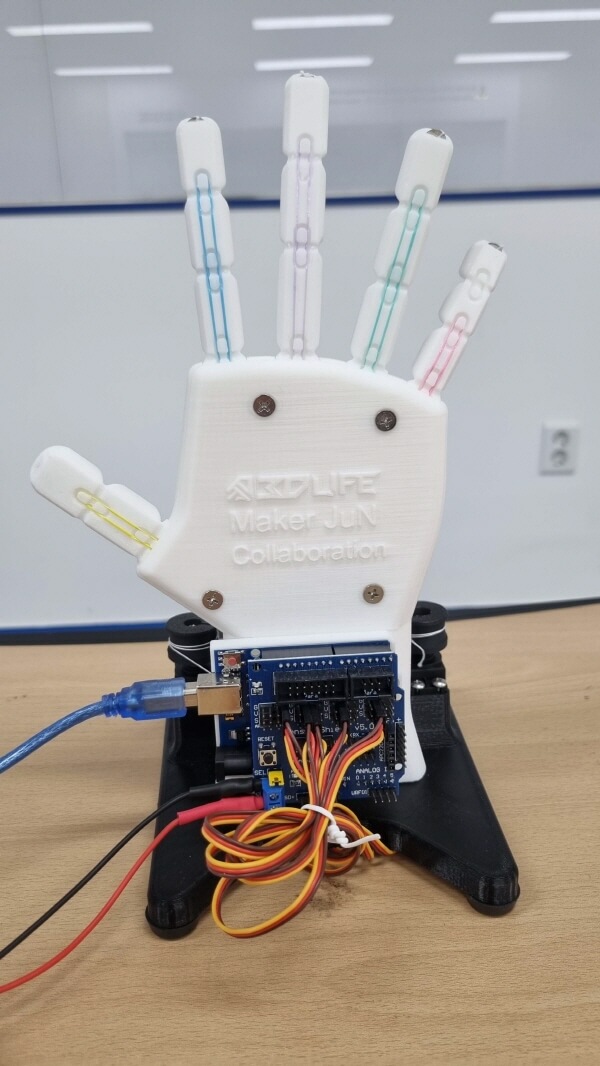
3D 프린터로 출력한 의수 조립
3D프린터로 출력시 손가락을 구부릴 수 있는 필라멘트를 사용해야하는데 일반적으로 사용하는 PLA필라멘트로는 구현이 잘 안되어서 아두이노 의수를 조립용 부품을 구매하여 진행하였습니다.
- 아두이노 의수 구매(핸드이노) : https://buly.kr/6XhtPD8
조립과정은 구매시 첨부된 동영상을 참고하시면 됩니다. 조립은 천천히 따라할 수 있는 수준으로 크게 어렵지 않습니다.
 |
 |
 |
 |
노트북에 관련 프로그램 설치(주피터노트북, 파이썬 라이브러리 등)
- 아나콘다 설치 : https://www.anaconda.com/download/

- 파이썬 라이브러리 설치 및 가상환경 설정
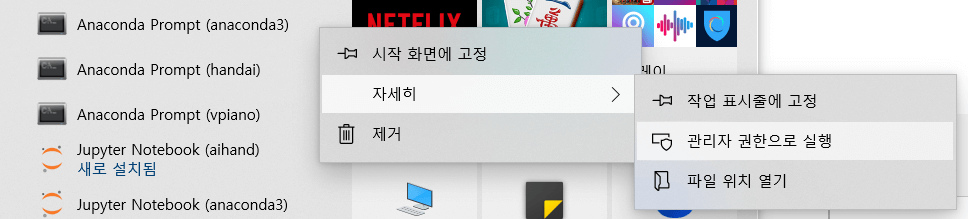
윈도우 검색창에 Anaconda Prompt(anaconda3) 검색 후 관리자 권한으로 실행
1. cmd 창에 아래의 명령을 순서대로 한줄씩 실행하면 된다. C 드라이브 루트로 이동하여 아래 명령을 실행한다. C드라이브 아래 handai라는 폴더를 만들어 진행함.
- cd /
- conda update -n base -c default conda
- mkdir handai
2. 생성된 디렉토리에서(가상환경 설정)
- cd handai
- conda create --name handai python=3.8 anaconda
- conda activate handai
3. handai 가상환경에서
- pip install --upgrade -user pip
- pip install --upgrade tensorflow
- pip install opencv-python
- pip install mediapipe
(혹시 mediapipe에서 오류가 나면 anaconda prompt base에서
- python -m pip install mediapipe
4. 주피터노트북 실행
(handai)c:\handai>jupyter notebook
5. 새로운 노트북을 만들어 아래 코드를 붙여넣기 한 후 웹캠테스트
import cv2

cam = cv2.VideoCapture(0)
cam.set(3,1280) #CV_CAP_PROP_FRAME_WIDTH
cam.set(4,720) #CV_CAP_PROP_FRAME_HEIGHT
#cam.set(5,0) #CV_CAP_PROP_FPS

while True:
    ret_val, img = cam.read() # 캠 이미지 불러오기

    cv2.imshow("Cam Viewer",img) # 불러온 이미지 출력하기
    if cv2.waitKey(1) == 27:
        break  # esc to quit
6. 아두이노 스케치 코드 업로드
- 아두이노 시리얼 통신 테스트
char cmd;

void setup() {
  Serial.begin(9600);
}

void loop() {

  if(Serial.available()){
    cmd = Serial.read();

    if(cmd=='a'){
      Serial.println("아두이노: a");
      delay(100);
    }
    else if(cmd=='b'){
      Serial.println("아두이노: b");
      delay(100);
    }
  }
}
아두이노 시리얼 통신이 잘 작동된다면 아래의 코드를 업로드한다. 노트북 카메라에서 인식된 손의 움직임에 따라 인식된 번호가 아두이노로 전송되면 해당하는 서보모터를 움직이게 하면 된다.
#include<Servo.h>
Servo servo_1;
Servo servo_2;
Servo servo_3;
Servo servo_4;
Servo servo_5;


void setup() {
  Serial.begin(9600);
  servo_1.attach(12);
  servo_2.attach(10);
  servo_3.attach(9);
  servo_4.attach(6);
  servo_5.attach(2);
  delay(500);
  servo_1.write(165);
  servo_2.write(165);
  servo_3.write(165);
  servo_4.write(165);
  servo_5.write(165);
  delay(5000);
}

void loop() {
  while (Serial.available() > 0) {
    char data = Serial.read();
    if (data == '1') {
     servo_1.write(0);
    }
    if (data == '2') {
     servo_1.write(165);
    }
     if (data == '3') {
      servo_2.write(0);
    }
    if (data == '4') {
     servo_2.write(165);
    }
    if (data == '5') {
      servo_3.write(0);
    }
     if (data == '6') {
      servo_3.write(165);
    }
    if (data == '7') {
     servo_4.write(0);
    }
    if (data == '8') {
      servo_4.write(165);
    }
     if (data == '9') {
      servo_5.write(0);
    }
    if (data == '0') {
     servo_5.write(165);
    }
  }
}
7. 노트북에 셀을 추가한 후 소스코드 복사하여 mediapipe 에 따라 손이 잘 인식되는지 테스트
import cv2
import mediapipe as mp

mp_drawing = mp.solutions.drawing_utils
mp_hands = mp.solutions.hands

cap = cv2.VideoCapture(0)

with mp_hands.Hands(
    max_num_hands=1,
    min_detection_confidence=0.5,
    min_tracking_confidence=0.5) as hands:

    while cap.isOpened():
        success, image = cap.read()
        if not success:
            continue
        image = cv2.cvtColor(cv2.flip(image, 1), cv2.COLOR_BGR2RGB)

        results = hands.process(image)

        image = cv2.cvtColor(image, cv2.COLOR_RGB2BGR)
        if results.multi_hand_landmarks:
            for hand_landmarks in results.multi_hand_landmarks:

                finger1 = int(hand_landmarks.landmark[8].x * 100 )
                finger2 = int(hand_landmarks.landmark[4].x * 100 )
                dist = abs(finger1 - finger2)

                cv2.putText(
                    image, text='f1=%d f2=%d dist=%d' % (finger1,finger2,dist), org=(10, 30),
                    fontFace=cv2.FONT_HERSHEY_SIMPLEX, fontScale=1,
                    color=(0,255,0), thickness=3)

                mp_drawing.draw_landmarks(
                    image, hand_landmarks, mp_hands.HAND_CONNECTIONS)


        cv2.imshow('image', image)


        if cv2.waitKey(1) ==  ord('q'):
            break
            cap.release()
            cv2.destoryAllWindows()
8. 드디어 마지막 단계 !! 주피터 노트북에서 새로운 셀을 만들어 라이브러리 설치
!pip install pyserial

!pip install pyglet
import cv2
import mediapipe as mp
import pyglet
import time
import math
import serial
ser = serial.Serial('COM32', 9600)
mp_drawing = mp.solutions.drawing_utils
mp_hands = mp.solutions.hands
cap = cv2.VideoCapture(0)
with mp_hands.Hands(
max_num_hands=1,
min_detection_confidence=0.5,
min_tracking_confidence=0.5) as hands:
while cap.isOpened():
success, image = cap.read()
if not success:
continue
image = cv2.cvtColor(cv2.flip(image, 1), cv2.COLOR_BGR2RGB)
results = hands.process(image)
image = cv2.cvtColor(image, cv2.COLOR_RGB2BGR)
if results.multi_hand_landmarks:
for hand_landmarks in results.multi_hand_landmarks:
finger0_x = int(hand_landmarks.landmark[0].x * 100 )
finger0_y = int(hand_landmarks.landmark[0].y * 100 )
finger4_x = int(hand_landmarks.landmark[4].x * 100 )
finger4_y = int(hand_landmarks.landmark[4].y * 100 )
finger8_x = int(hand_landmarks.landmark[8].x * 100 )
finger8_y = int(hand_landmarks.landmark[8].y * 100 )
finger9_x = int(hand_landmarks.landmark[9].x * 100 )
finger9_y = int(hand_landmarks.landmark[9].y * 100 )
finger12_x = int(hand_landmarks.landmark[12].x * 100 )
finger12_y = int(hand_landmarks.landmark[12].y * 100 )
finger16_x = int(hand_landmarks.landmark[16].x * 100 )
finger16_y = int(hand_landmarks.landmark[16].y * 100 )
finger20_x = int(hand_landmarks.landmark[20].x * 100 )
finger20_y = int(hand_landmarks.landmark[20].y * 100 )
dist_1 = int(math.sqrt((finger4_x - finger9_x)**2 + (finger4_y - finger9_y)**2))
dist_2 = int(math.sqrt((finger8_x - finger0_x)**2 + (finger8_y - finger0_y)**2))
dist_3 = int(math.sqrt((finger12_x - finger0_x)**2 + (finger12_y - finger0_y)**2))
dist_4 = int(math.sqrt((finger16_x - finger0_x)**2 + (finger16_y - finger0_y)**2))
dist_5 = int(math.sqrt((finger20_x - finger0_x)**2 + (finger20_y - finger0_y)**2))
cv2.putText(
image, text='dist_1=%d dist_2=%d dist_3=%d dist_4=%d dist_5=%d' % (dist_1,dist_2,dist_3,dist_4,dist_5), org=(10, 30),
fontFace=cv2.FONT_HERSHEY_SIMPLEX, fontScale=0.7,
color=(255,130,130), thickness=3)
if dist_1<=15:
ser.write(b'1')
else:
ser.write(b'2')
if dist_2<=22:
ser.write(b'3')
else:
ser.write(b'4')
if dist_3<=18:
ser.write(b'5')
else:
ser.write(b'6')
if dist_4<=18:
ser.write(b'7')
else:
ser.write(b'8')
if dist_5<=18:
ser.write(b'9')
else:
ser.write(b'0')
mp_drawing.draw_landmarks(
image, hand_landmarks, mp_hands.HAND_CONNECTIONS)
else:
ser.write(b'2')
ser.write(b'4')
ser.write(b'6')
ser.write(b'8')
ser.write(b'0')
cv2.imshow('image', image)
if cv2.waitKey(1) & 0xFF == ord('q'):
cap.release()
cv2.destroyAllWindows()
break완성된 작동 영상
mediapipe 라이브러리를 이용해 인식된 손가락 번호의 거리를 계산하여 손가락번호를 아두이노에 시리얼로 번호를 전송하면 서보모터에 연결된 핀번호로 인식되고 번호에 따라 각도를 조절하여 손가락을 움직인다.
'피지컬컴퓨팅 > 아두이노' 카테고리의 다른 글
| LED 제어하기 (1) | 2024.03.05 |
|---|---|
| 미세먼지 측정하기-아두이노, 미세먼지센서, LCD, 온습도센서 (0) | 2023.07.10 |
| 아두이노 우노 + 2.4 TFT LCD 디스플레이 쉴드 터치 패널 ILI9341 (0) | 2023.04.17 |
| 아두이노 선풍기(L9110) 팬모터로 만들기(버튼, 초음파센서) (0) | 2023.04.07 |
| 아두이노와 LCD 사용 한 번에 끝내기(온습도,토양수분, 소리감지,초음파센서 응용방법) (0) | 2023.04.07 |


